Replit Setup
- Go to Replit and create an account.
- If a menu like the one below appears, skip to step 4.
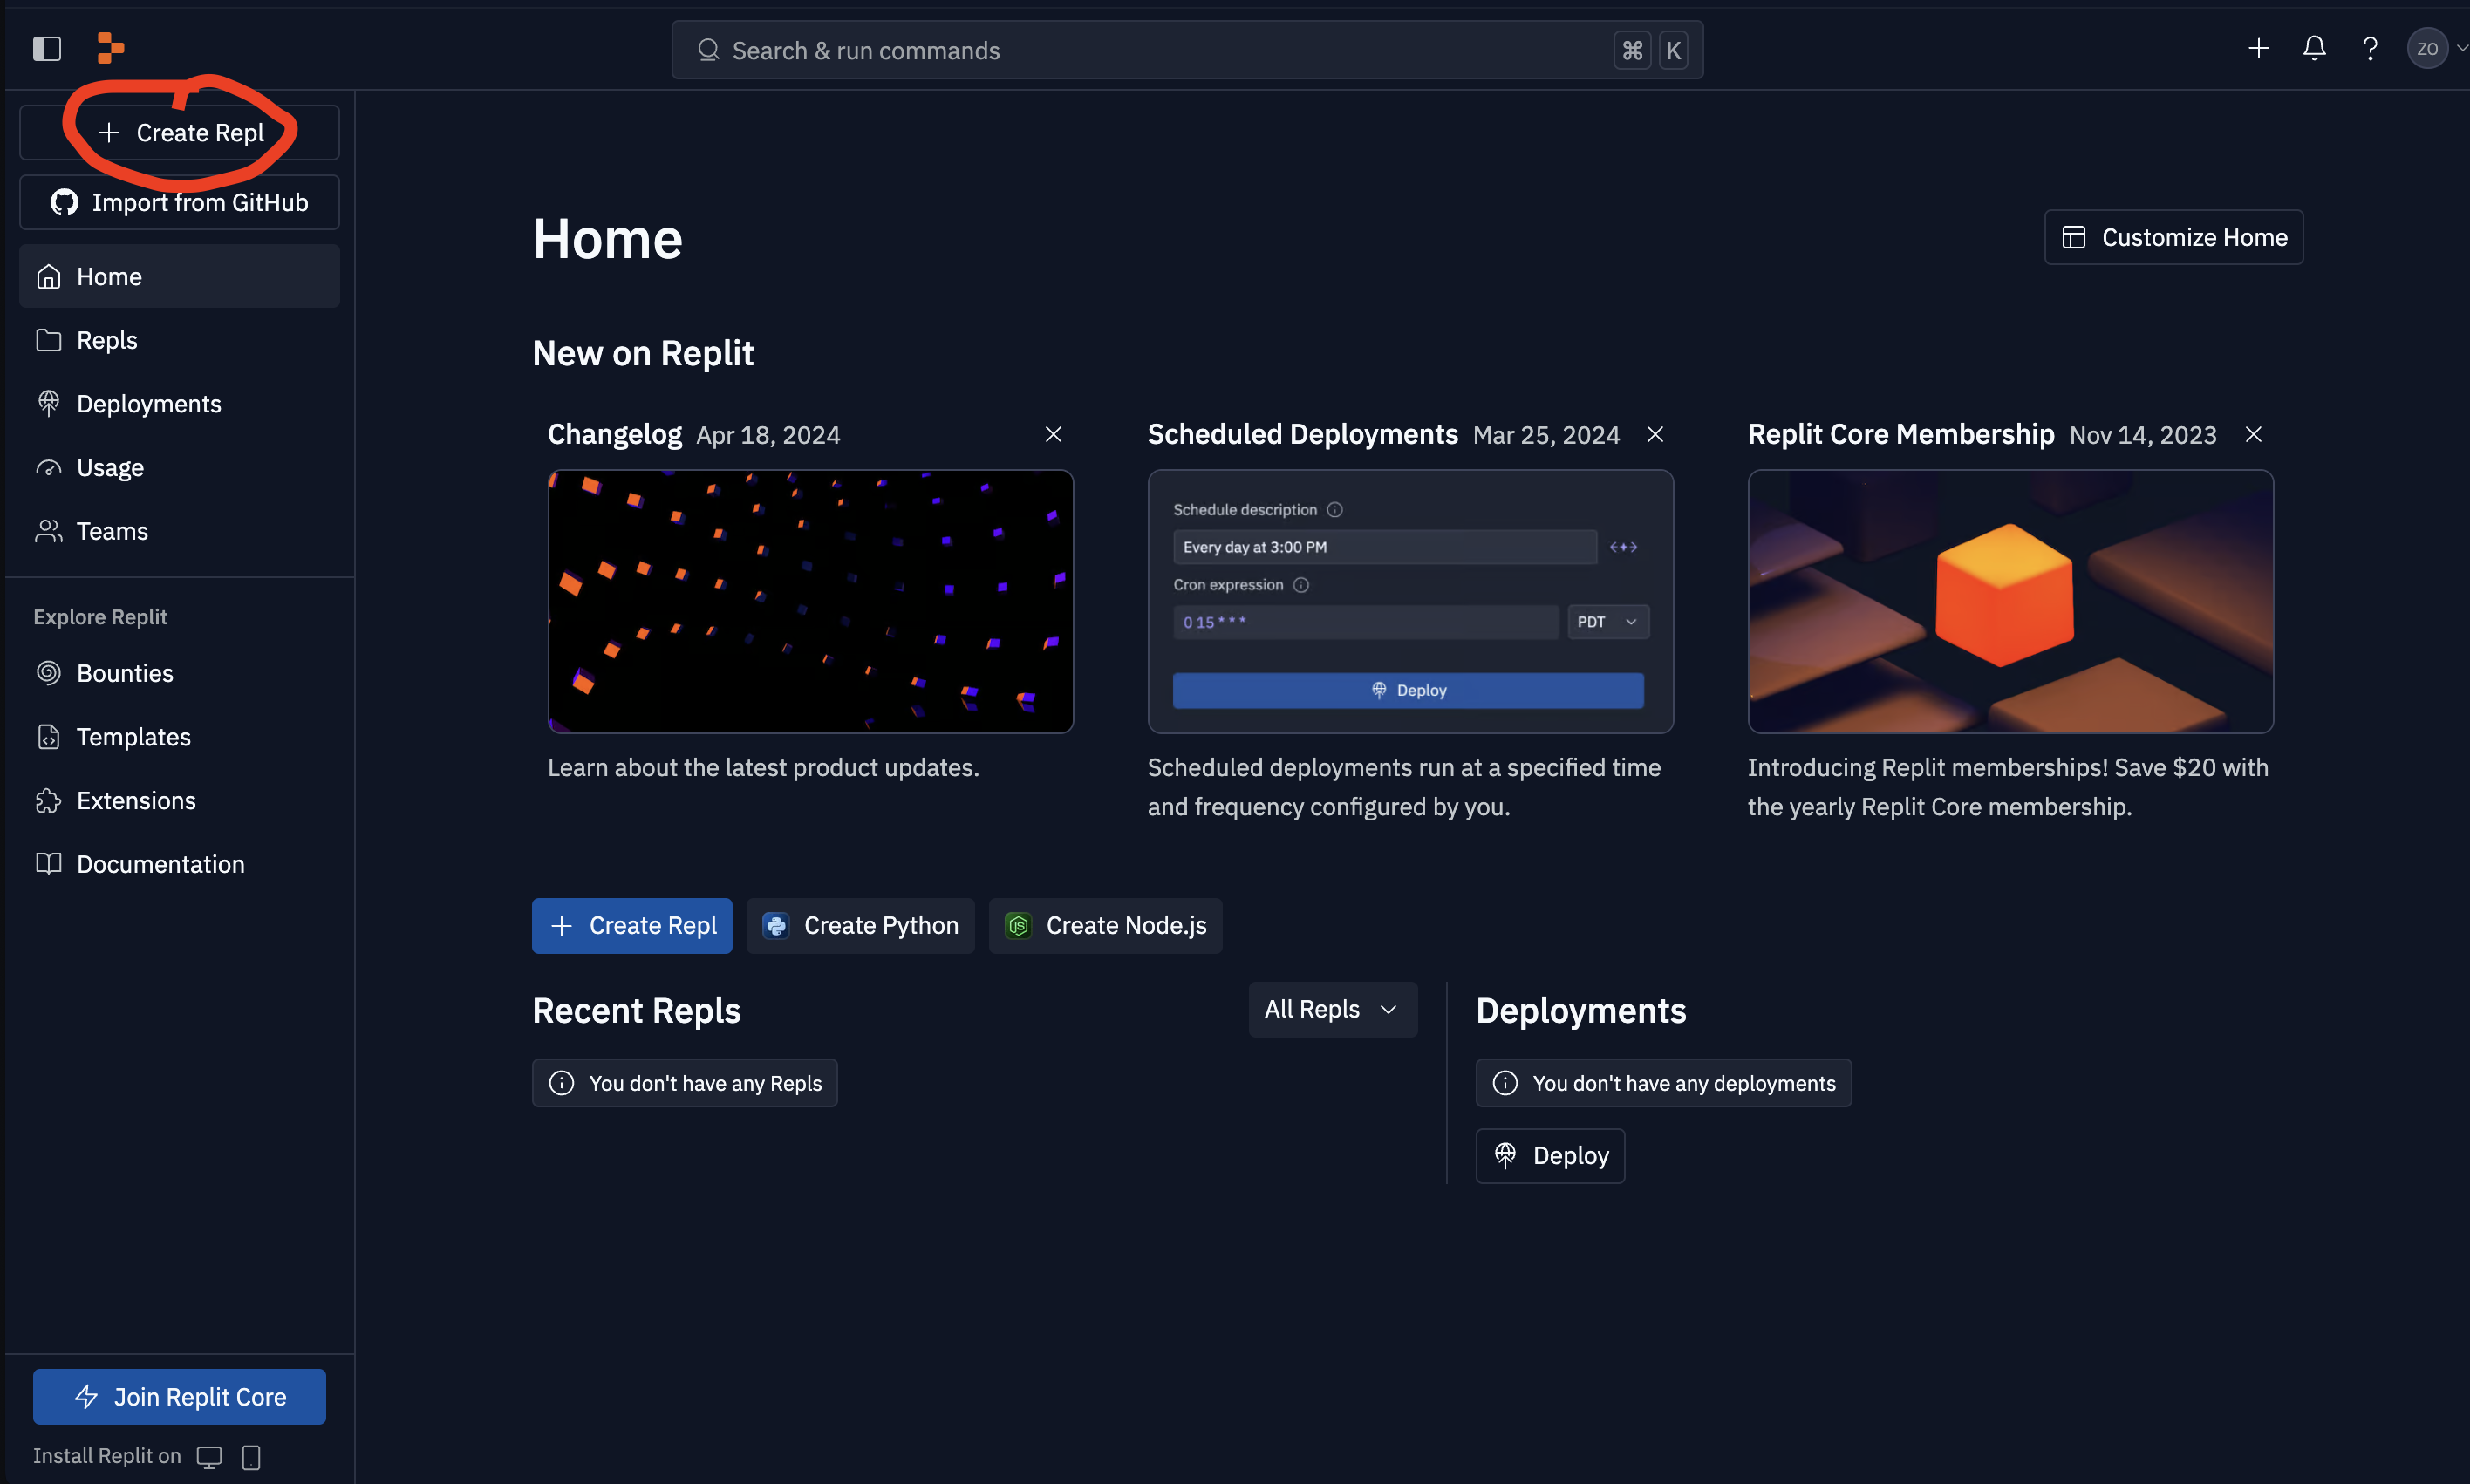
- Once you're on the home page, click the "Create Repl" button, as shown in the red circle in the screenshot below.
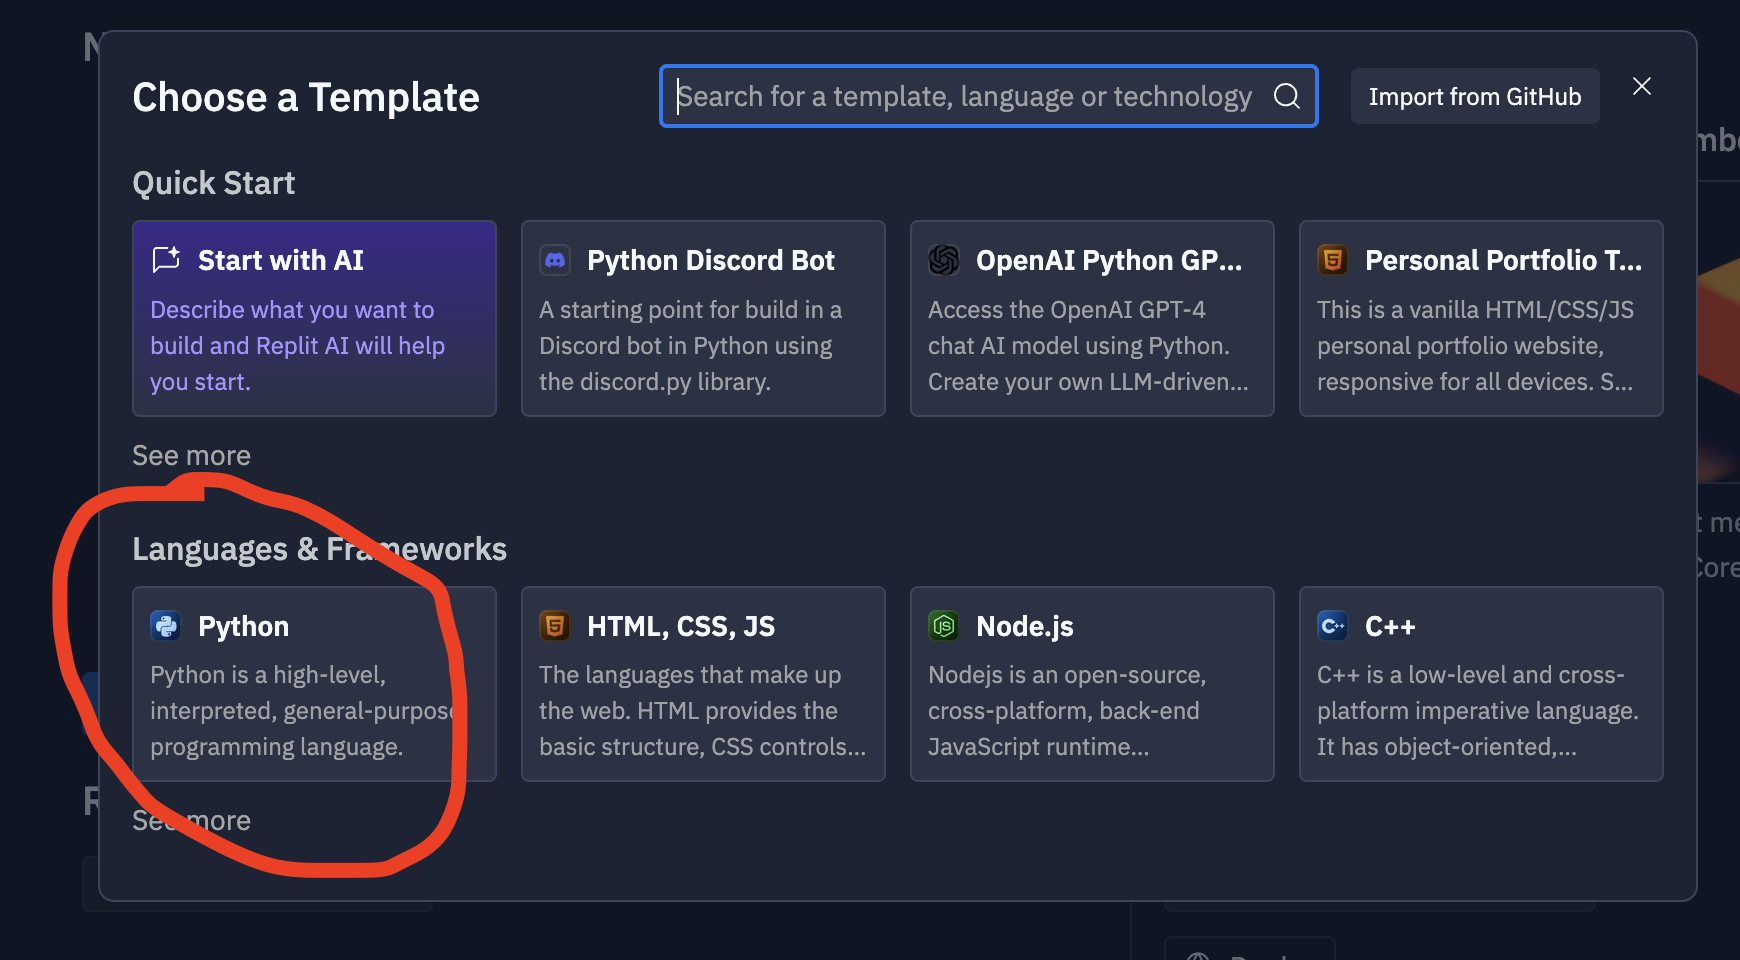
- Choose the "Python" template, as shown in the red circle in the screenshot below.
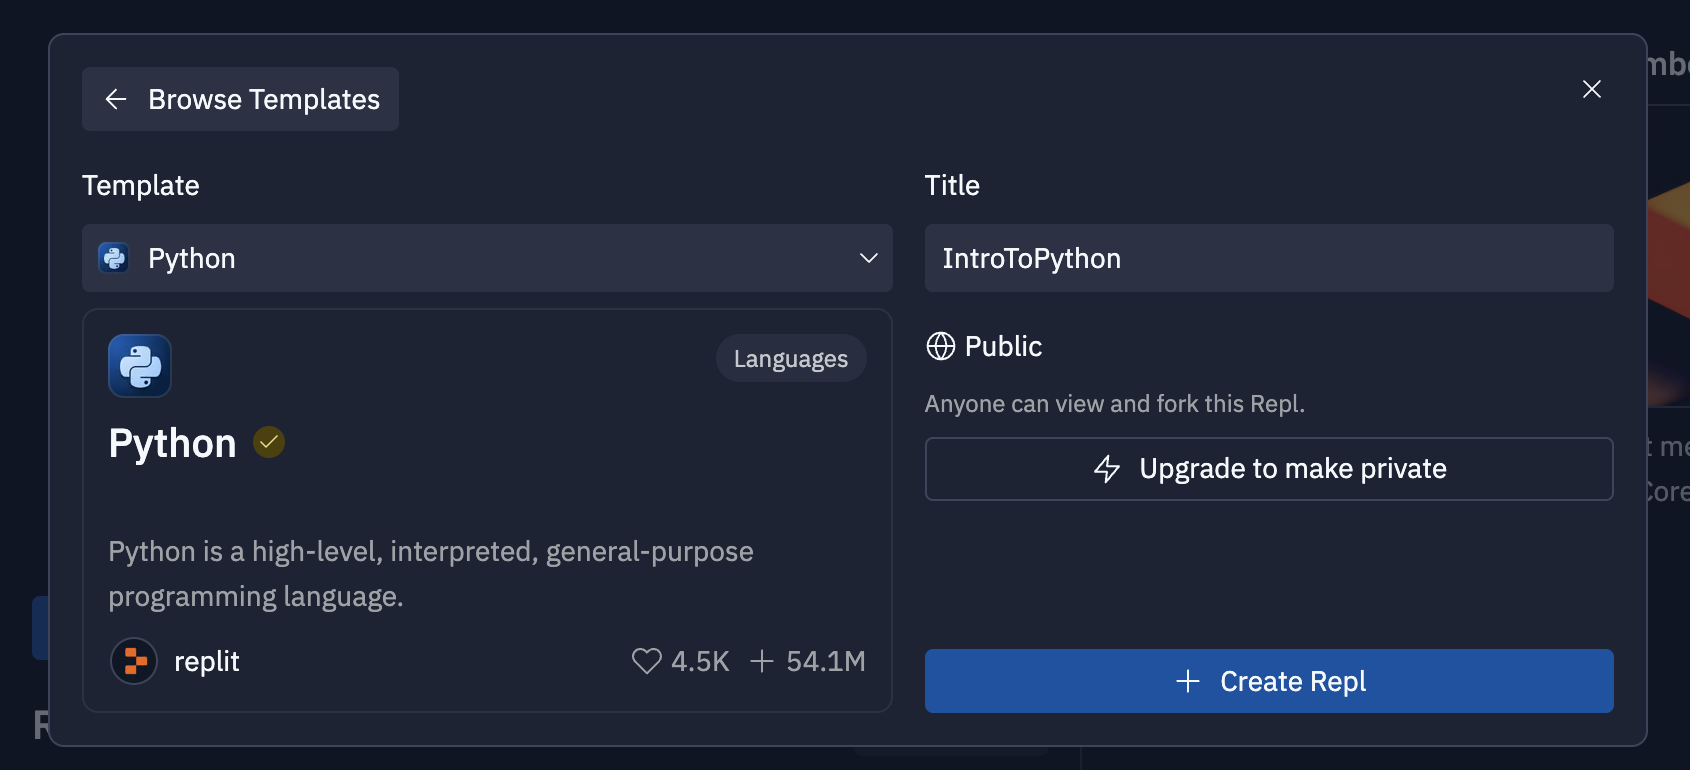
- Give your Repl the title "Intro To Python" and then click the blue "Create Repl" button.
- You should now see a screen like the one below.
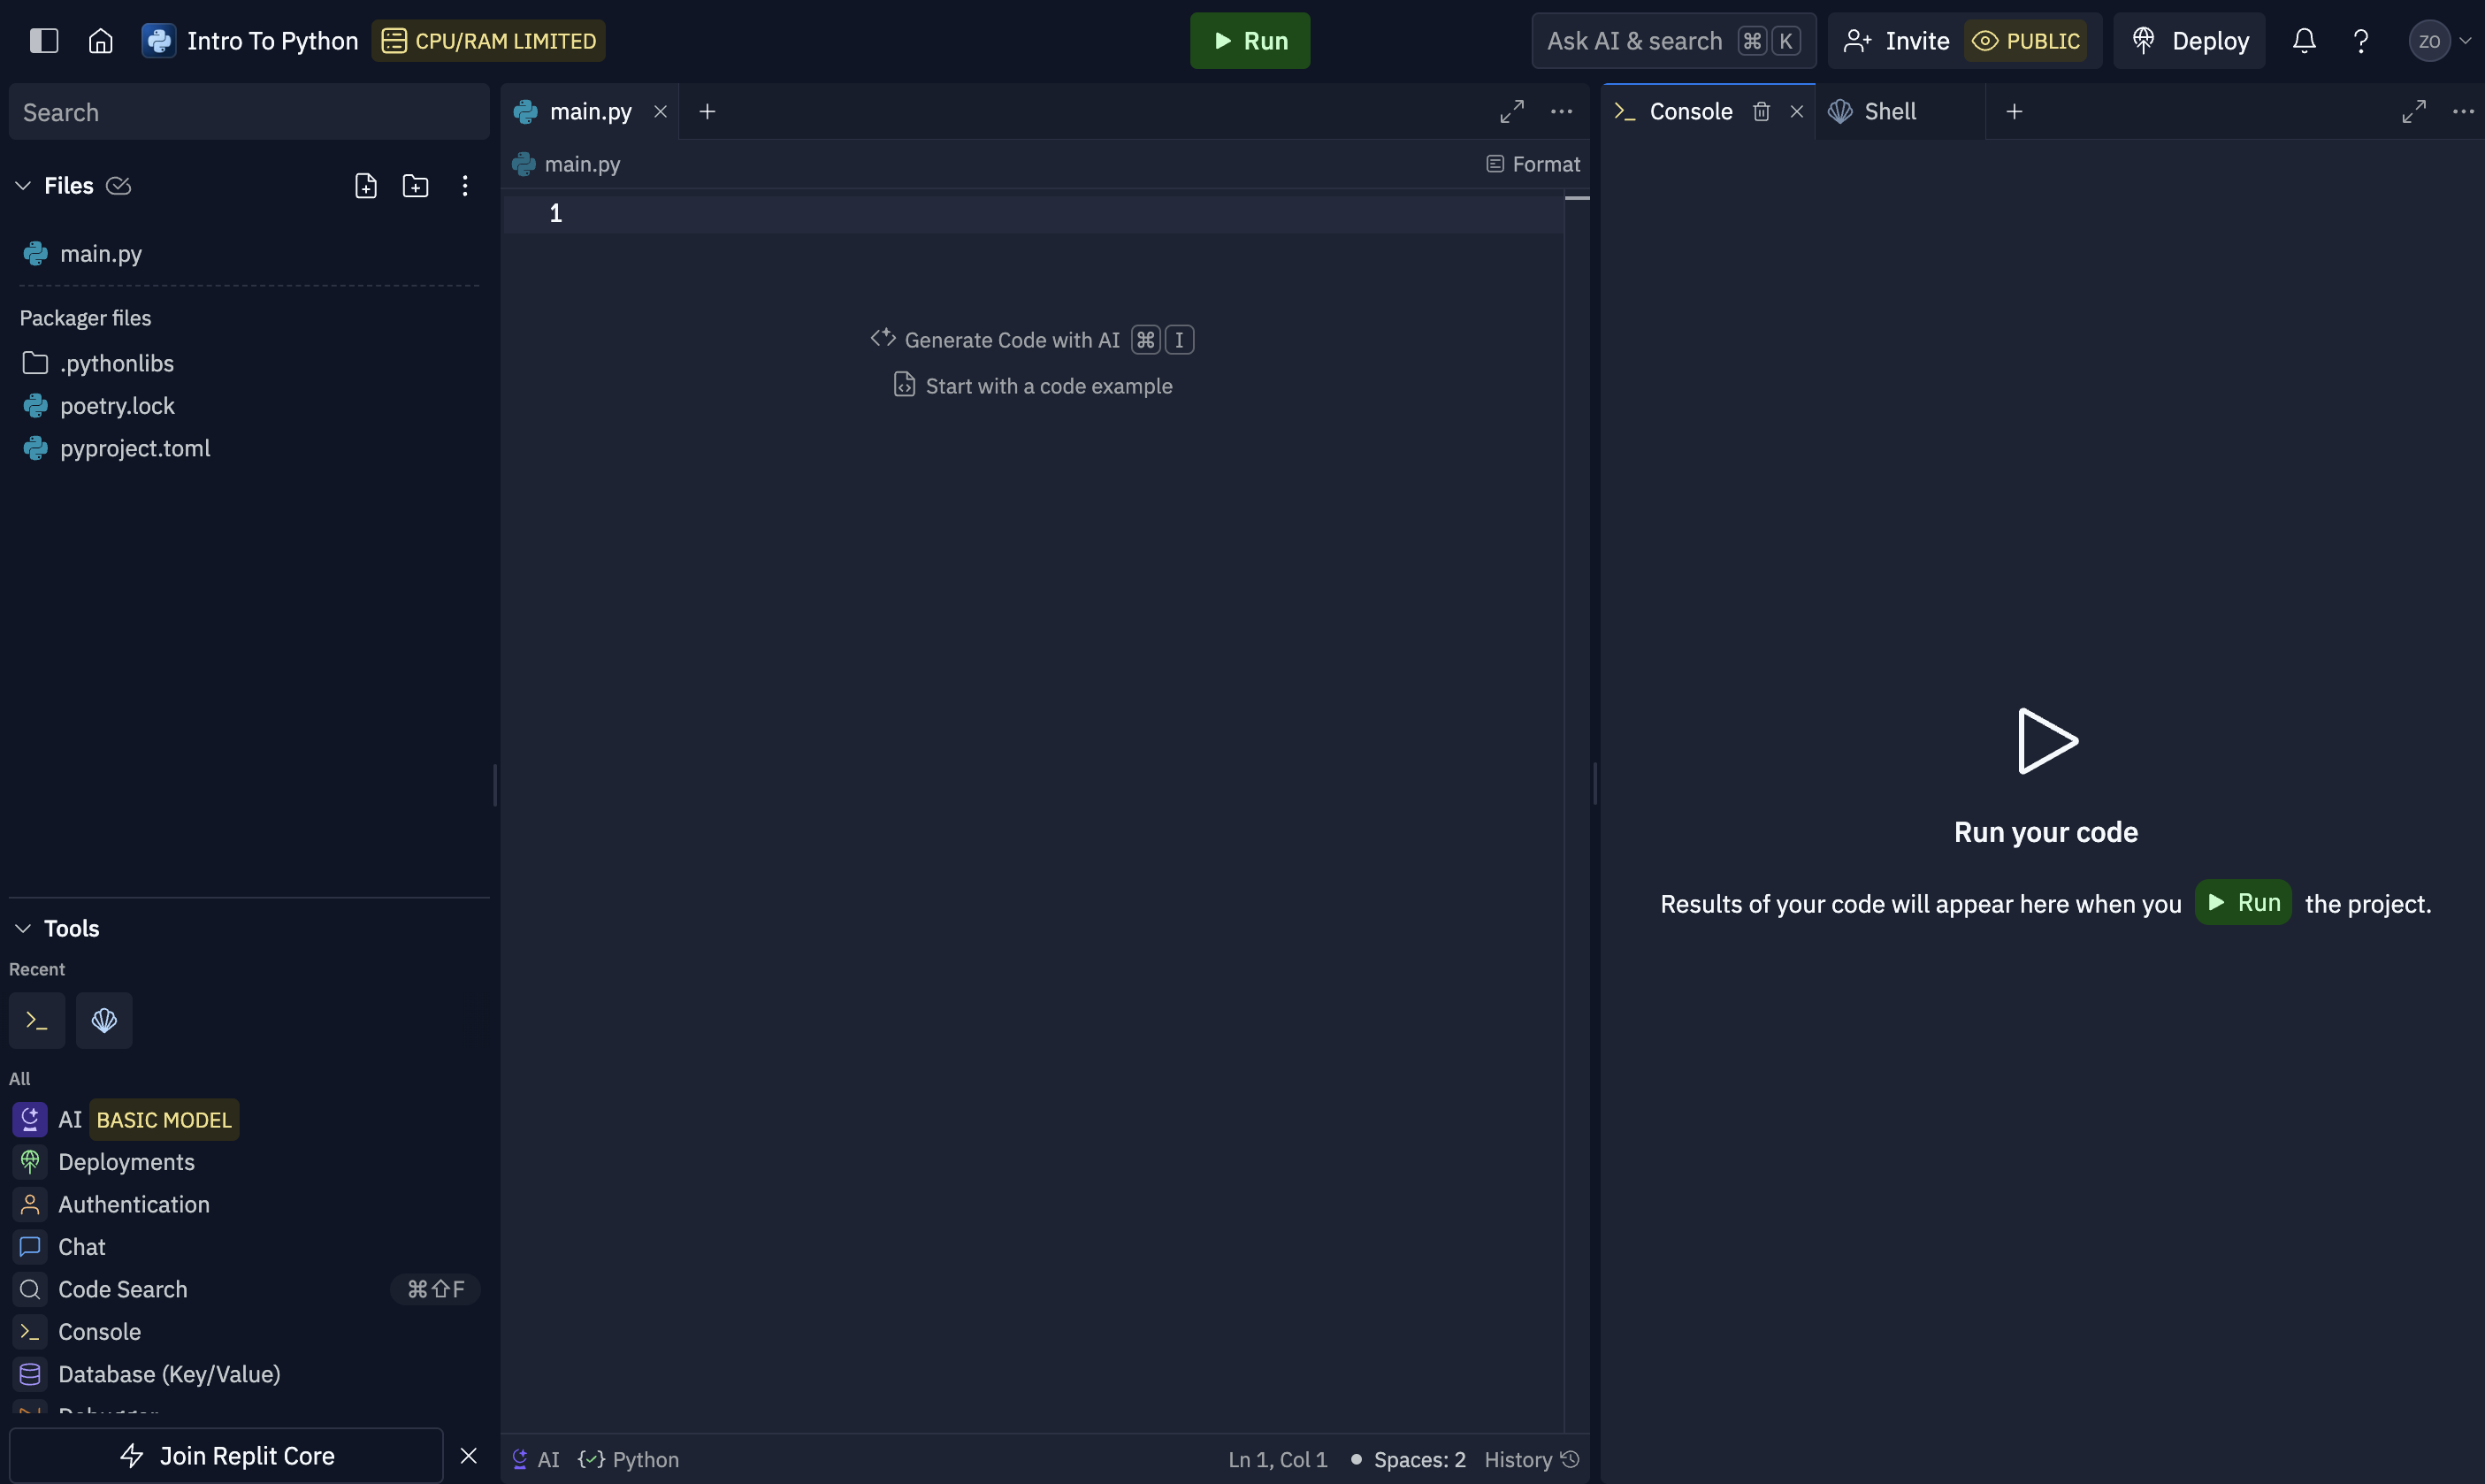
The middle panel is the code editor. This is where you will write your Python code.
The left "Files" panel shows you all the files in the project. We currently have a single file called main.py. Your Python code will go in this file.
The right "Console" panel shows you the output of your code. When you run your code, the output will appear here. Note that the console panel also has another tab called "Shell" that lets you type in commands. We can run our Python code by typing commands into the shell instead of clicking the green "Run" button.
Towards the bottom left, there is also a "Tools" tab. We won't need to access most of these tools, but if you accidentally close your console or shell tabs, you can reopen them from here.
- In the tools tab at the bottom left, click on the "User Settings" tab. You should see a new tab on the right panel.
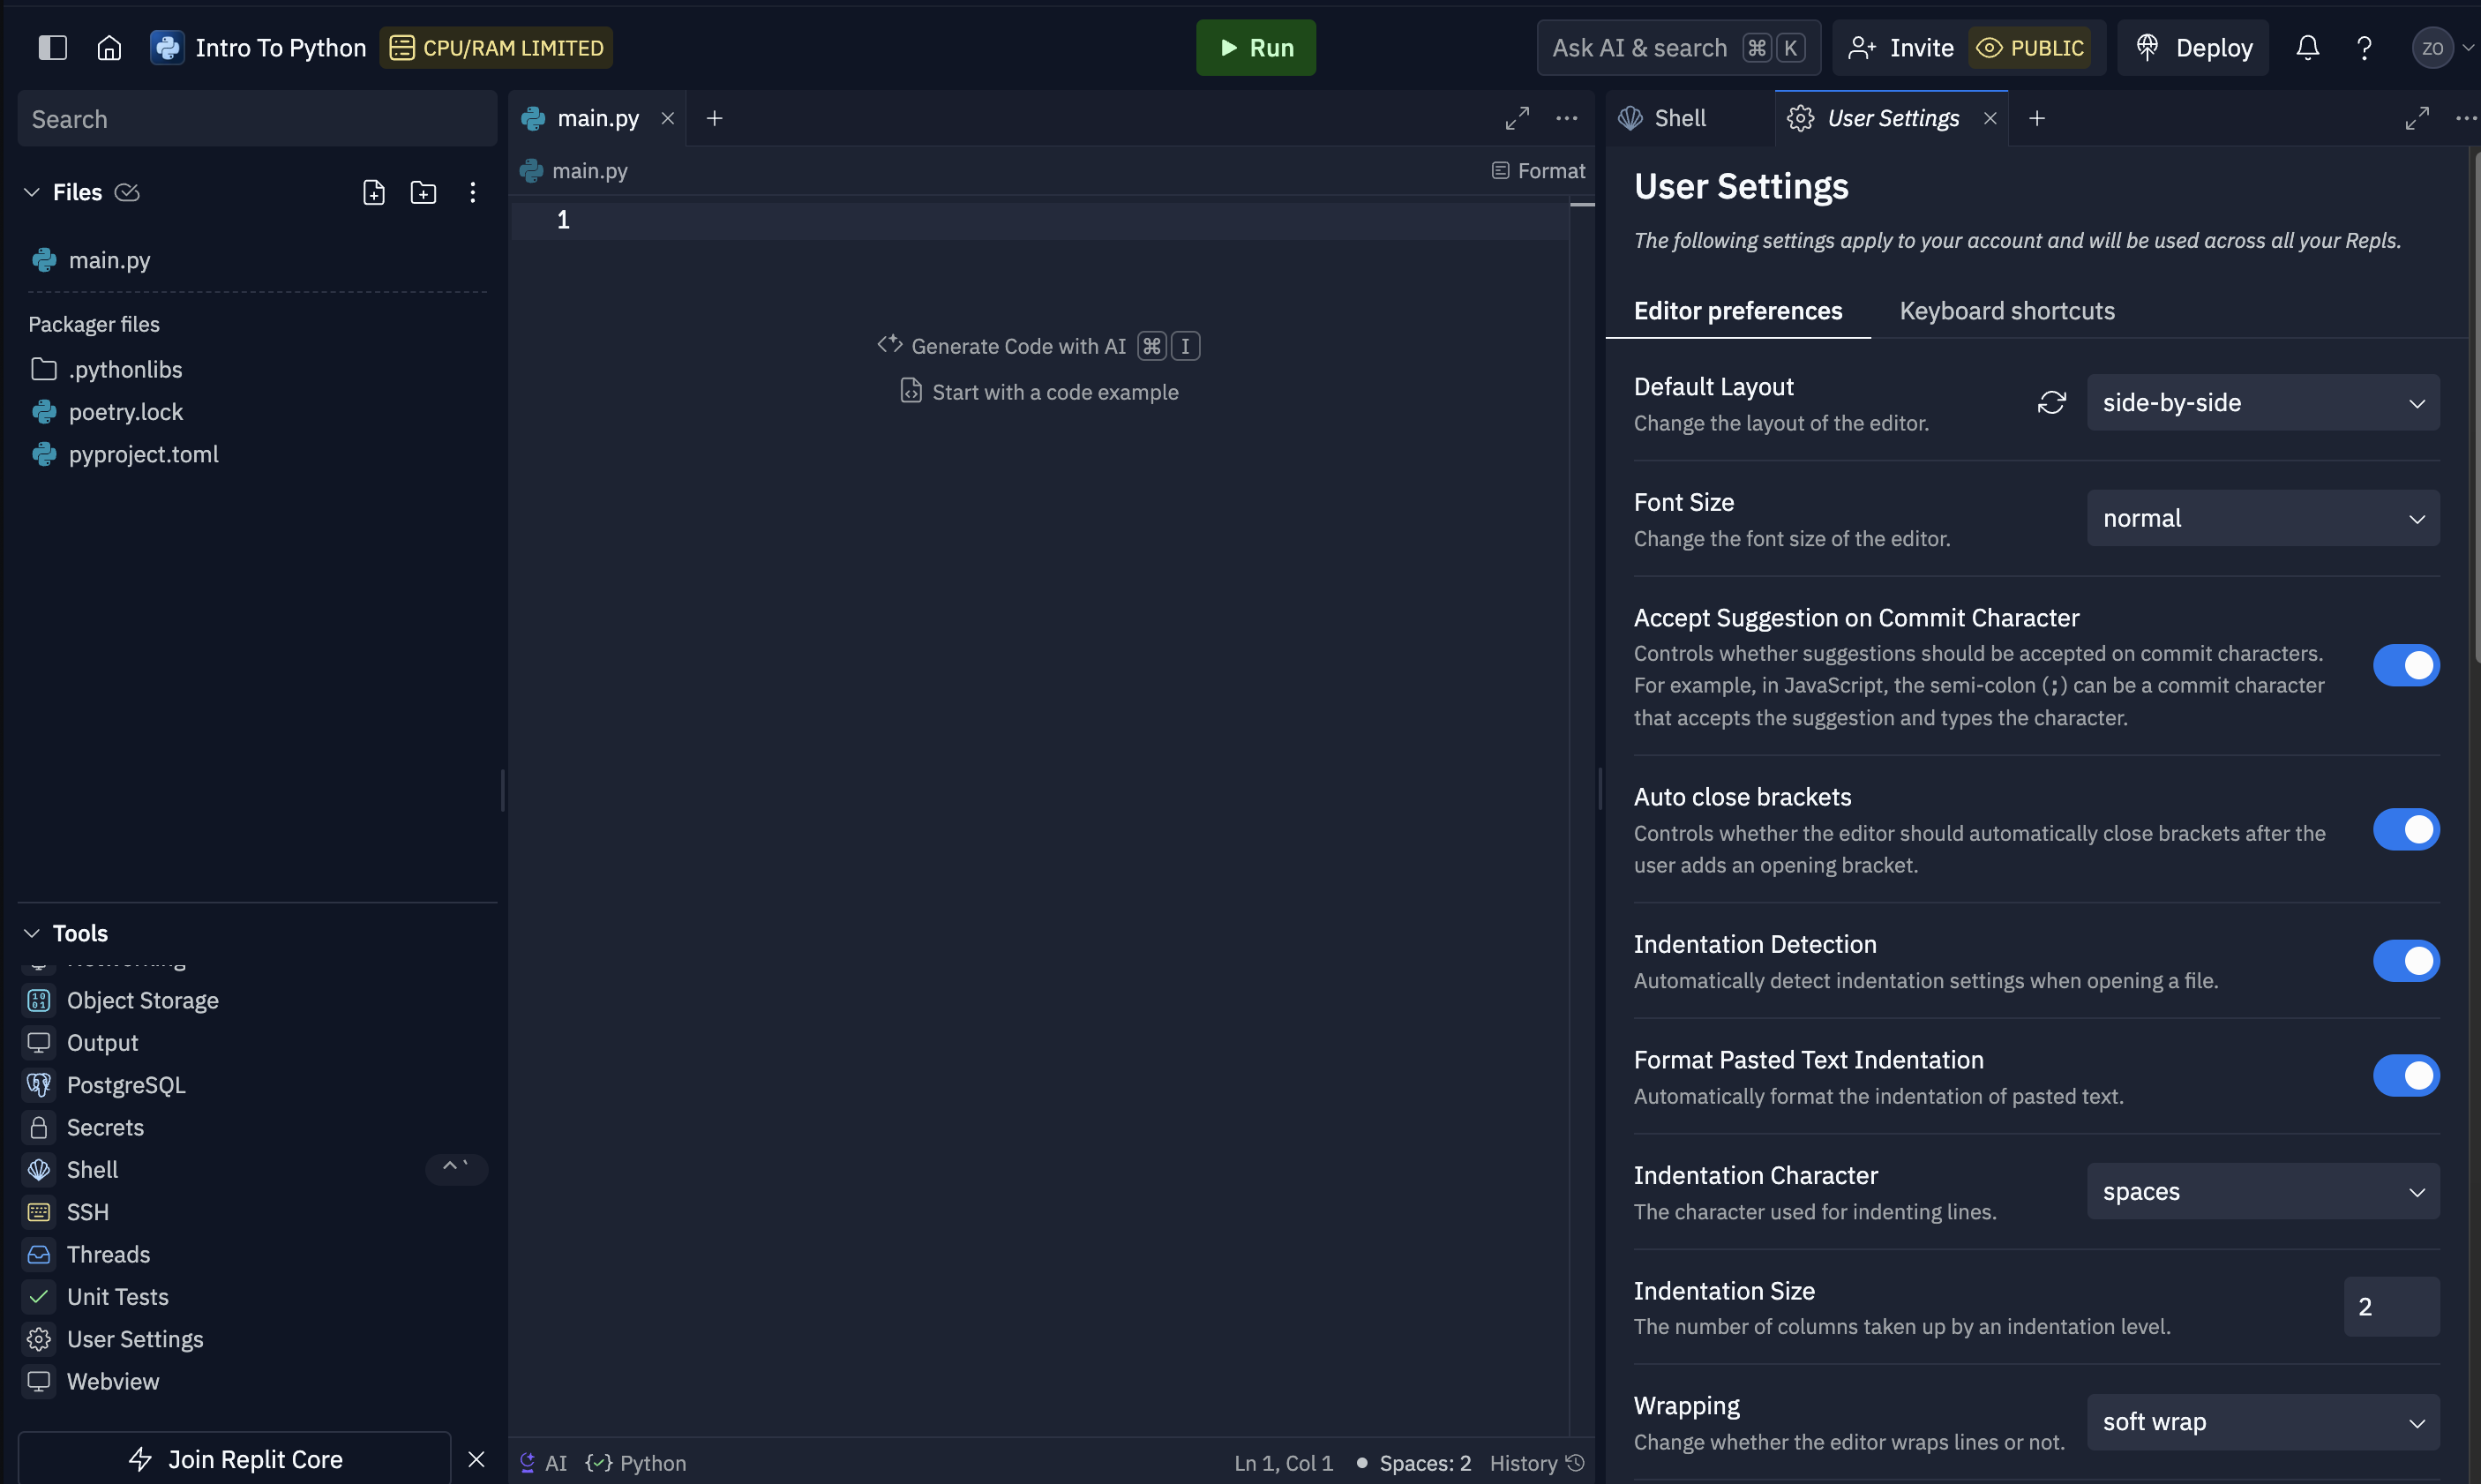
- Scroll down and deselect the following options:
- AI Code Completion
- Use advanced AI Model
- Code Intelligence
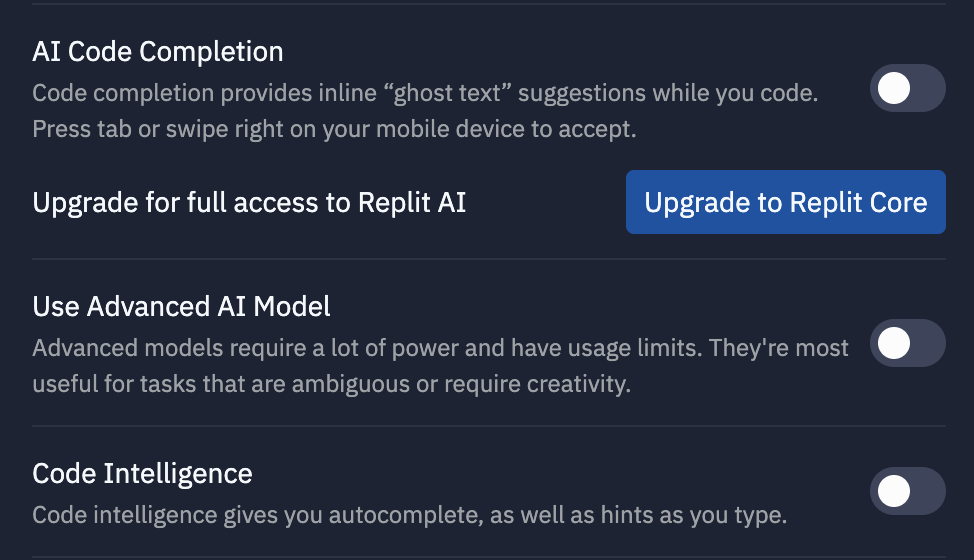
These are advanced features that we won't be using in this course. We want to keep things simple and focus on learning the basics of Python.
-
Close the "User Settings" tab and go back to the main editor screen.
-
In the editor, typing in the following code:
print("Hello, World!")
-
Click the green "Run" button at the top of the screen. You should see the output
Hello, World!in the console panel. Congratualations! You've successfully run your first Python program in Replit. -
You're all set up! If you have any questions or need help, feel free to ask your instructor or classmates. Happy coding!